A step-by-step guide to creating your own eStore with UnionBank GlobalLinker
Ecommerce
218 week ago — 17 min read
Do you want to sell your products online? UnionBank GlobalLinker’s eCommerce platform, Linker.store, enables you to create an online store for free as long as you have an account on the platform.
Creating an online store through UnionBank GlobalLinker allows you to do the following:
- An online store to showcase your brand and sell your products
- Inventory management system
- A wide range of design themes you can select to customize your website
- Pre-Integrated Payment gateways to allow your customers to pay online using all the popular digital payment mediums
- Quickly and easily delivery to your customers using the pre-integrated automated Logistics
Here is a comprehensive step-by-step guide to create your online store with UnionBank GlobalLinker.
First, create an account on UnionBank GlobalLinker
Create an account on UnionBank GlobalLinker to start. Once you have done that and are on the platform, you will see an Online Store button on the top menu bar. Click on Online Store.
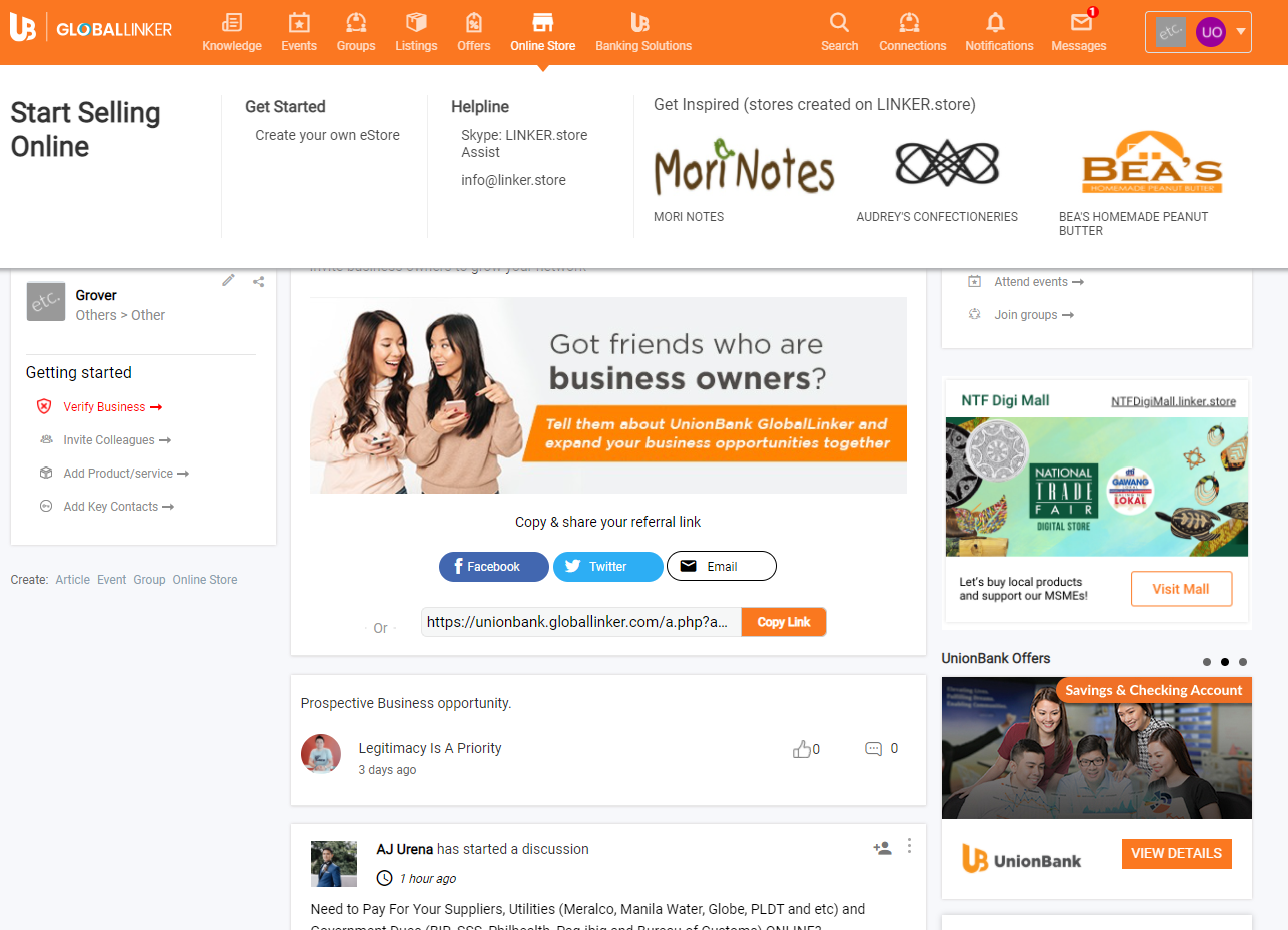
On overlay with Terms of Use will appear. Read it and then click on I Agree
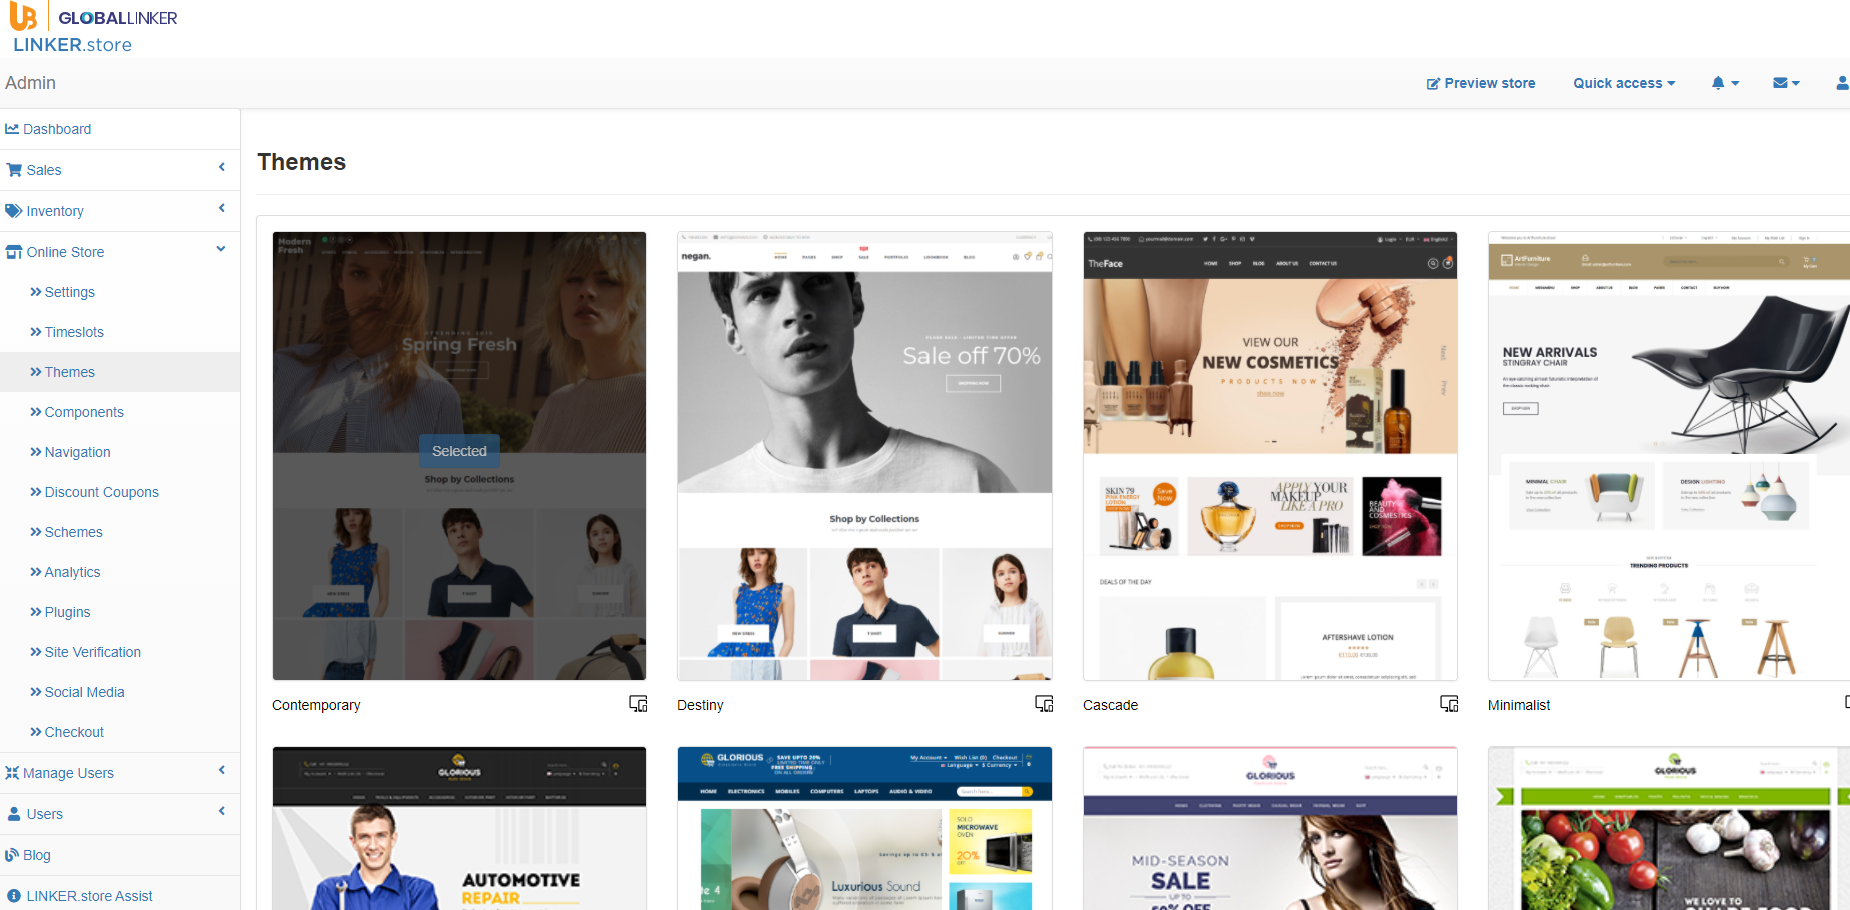
STEP 1: Selecting your theme
Choose a theme as per your preference.
Note: The images showcased in the themes are for illustration purposes. It does not mean that the theme can be used only for the products shown in its images. Any theme can be used for any products.
STEP 2: Name your store
After you select a theme, you will get directed to Name your store. Here, your company name used while creating the account for UnionBank GlobalLinker is generated automatically. Even the URL is auto-generated, but you can change both of them if you wish. Your store URL should have at least 8 to a maximum of 25 characters.
Note: Once your online store is set up, you can replace the Linker.store domain with a personalized domain.
Select your store currency: Choose the currency for your store from the drop-down.
Add a store description: This is very important; it is displayed in the footer of your online store to help visitors understand what that store is about. It is also displayed on the search engines as a meta description
Note: Keep the first 180 characters very relevant and to the point to optimize SEO (Search Engine Optimisation)
Upload a store logo: The ideal logo dimension is 200px X 200px. For the Favicon, the recommended ss are 60px X 60px (A favicon is a shortcut icon that is seen in the tab window along with the website name.)
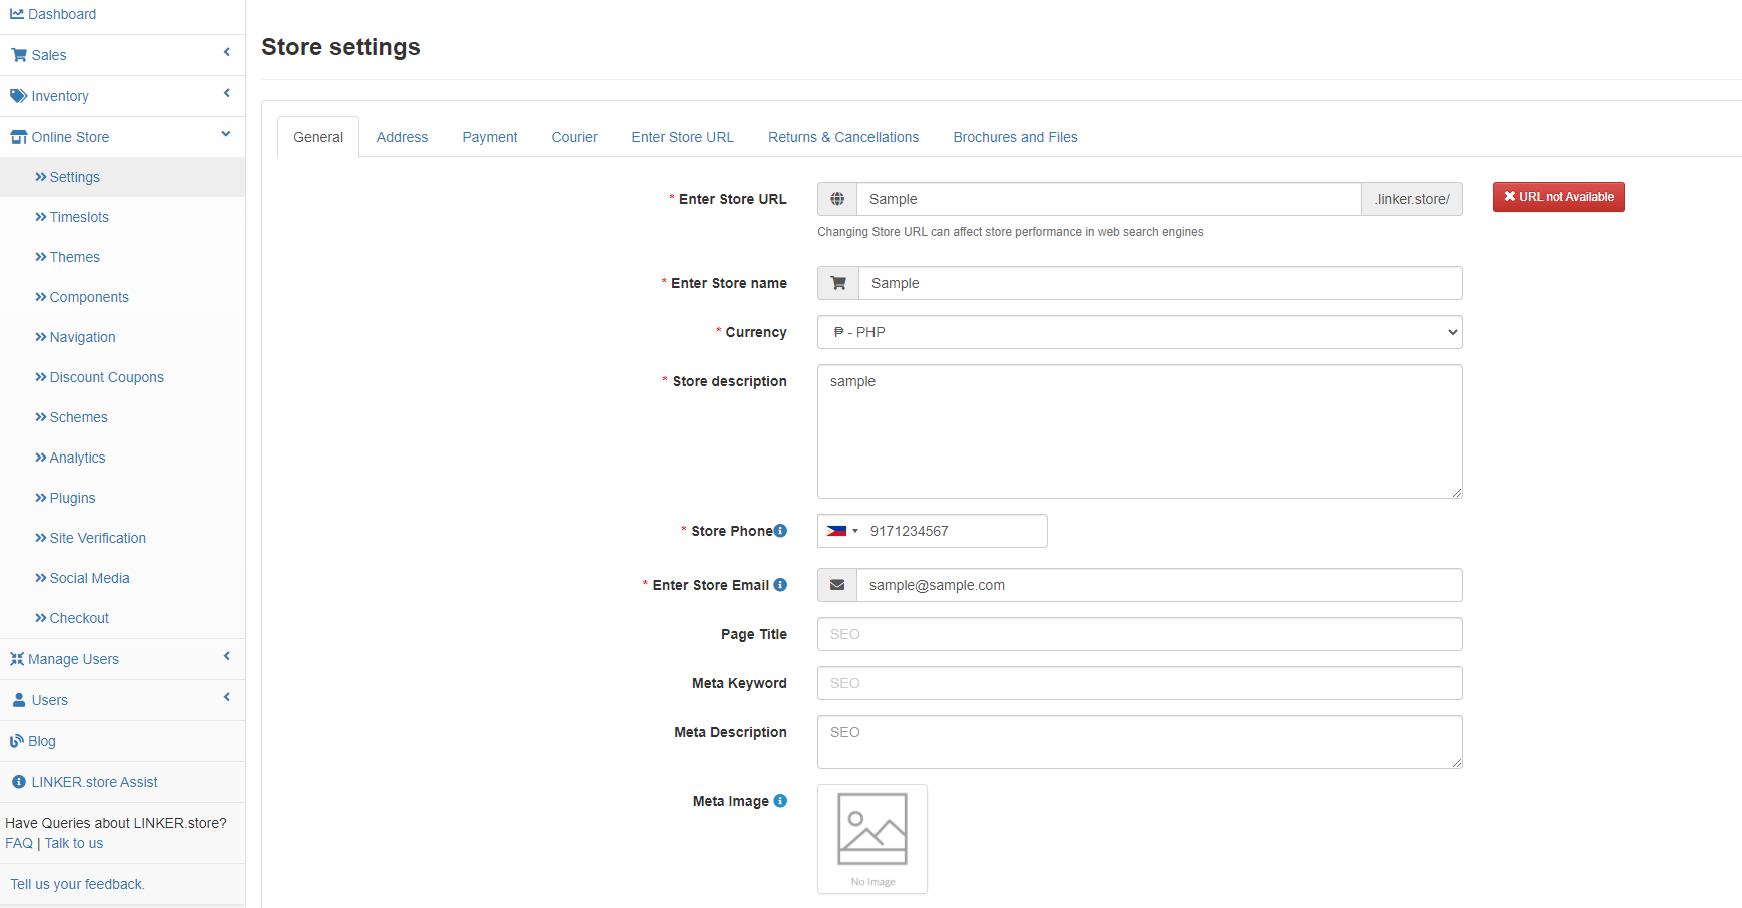
Store Contact Details: Add or edit your contact details. Your number and email id will be pre-populated from your sign-up information.
Address: Enter your store address, city, and postal code
Select I Agree to the Terms of Service and click on Next
STEP 3: Stock your store
Products are the goods or services that you would like to sell in your online store. You can create products by entering product details and uploading product images.
There are multiple ways of adding products to your store, which are listed below:
- Manual Upload (Add products one at a time)
- Bulk Upload (Using excel/csv files)
Let’s discuss the two types of products before we move further: Simple Products and Products with Variants. By default, all products have at least one variant to be added. If you want to offer options within a product, such as Color, S, etc., you can create multiple variants within the same product.
Simple Products
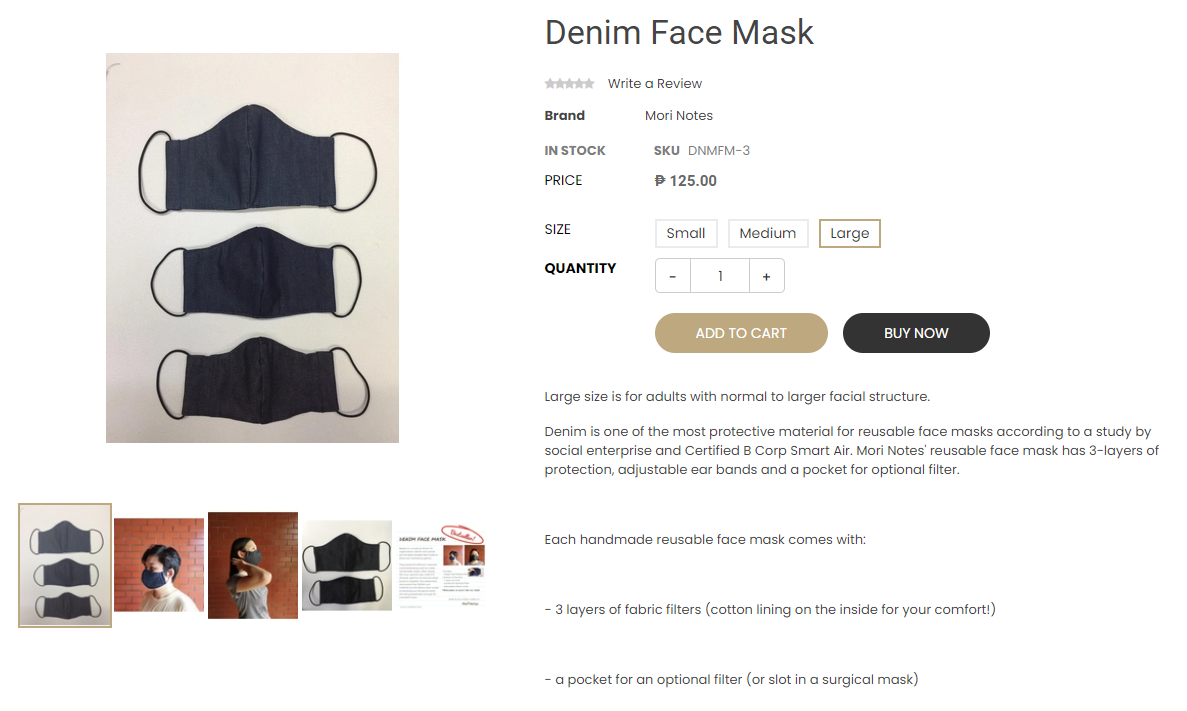
Products with Variants
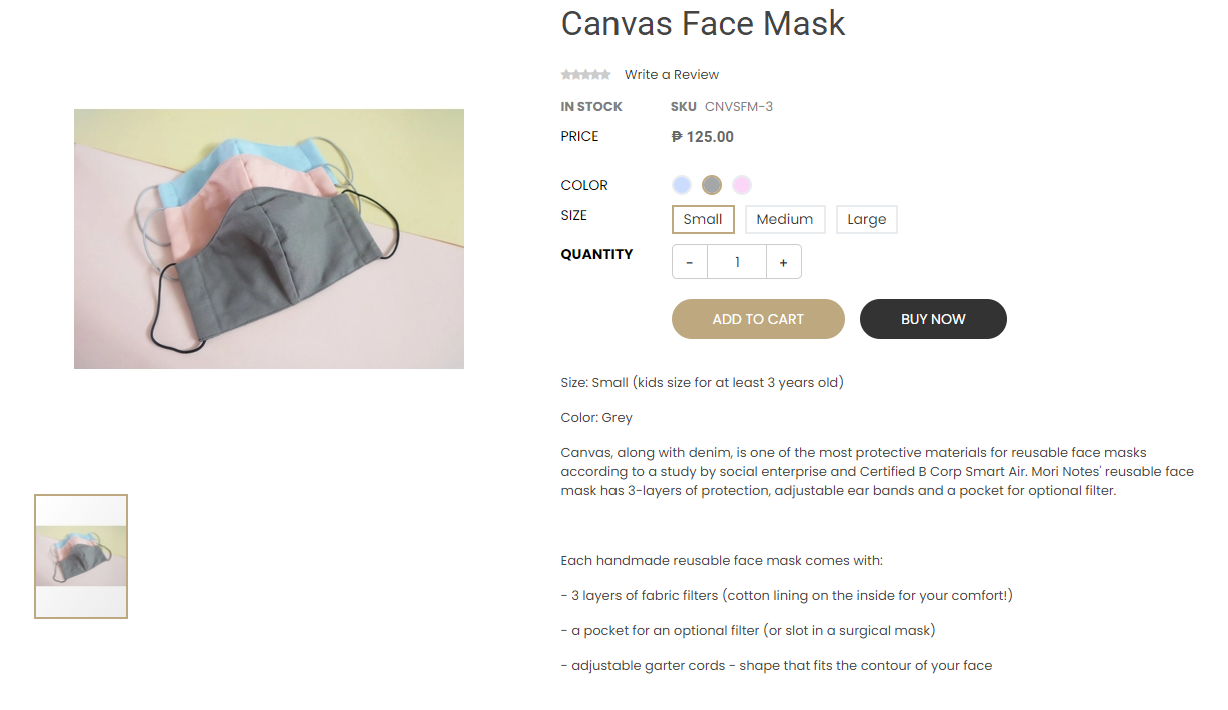
|
Simple Products |
Products with Variants |
|
Product with only one variant |
Product with Multiple variants |
|
Adding Attributes is not mandatory |
Attributes are mandatory for the customer to select between various options on Product Page |
Note: We’ll cover attributes in detail in the Add Variants section.
Manual Upload
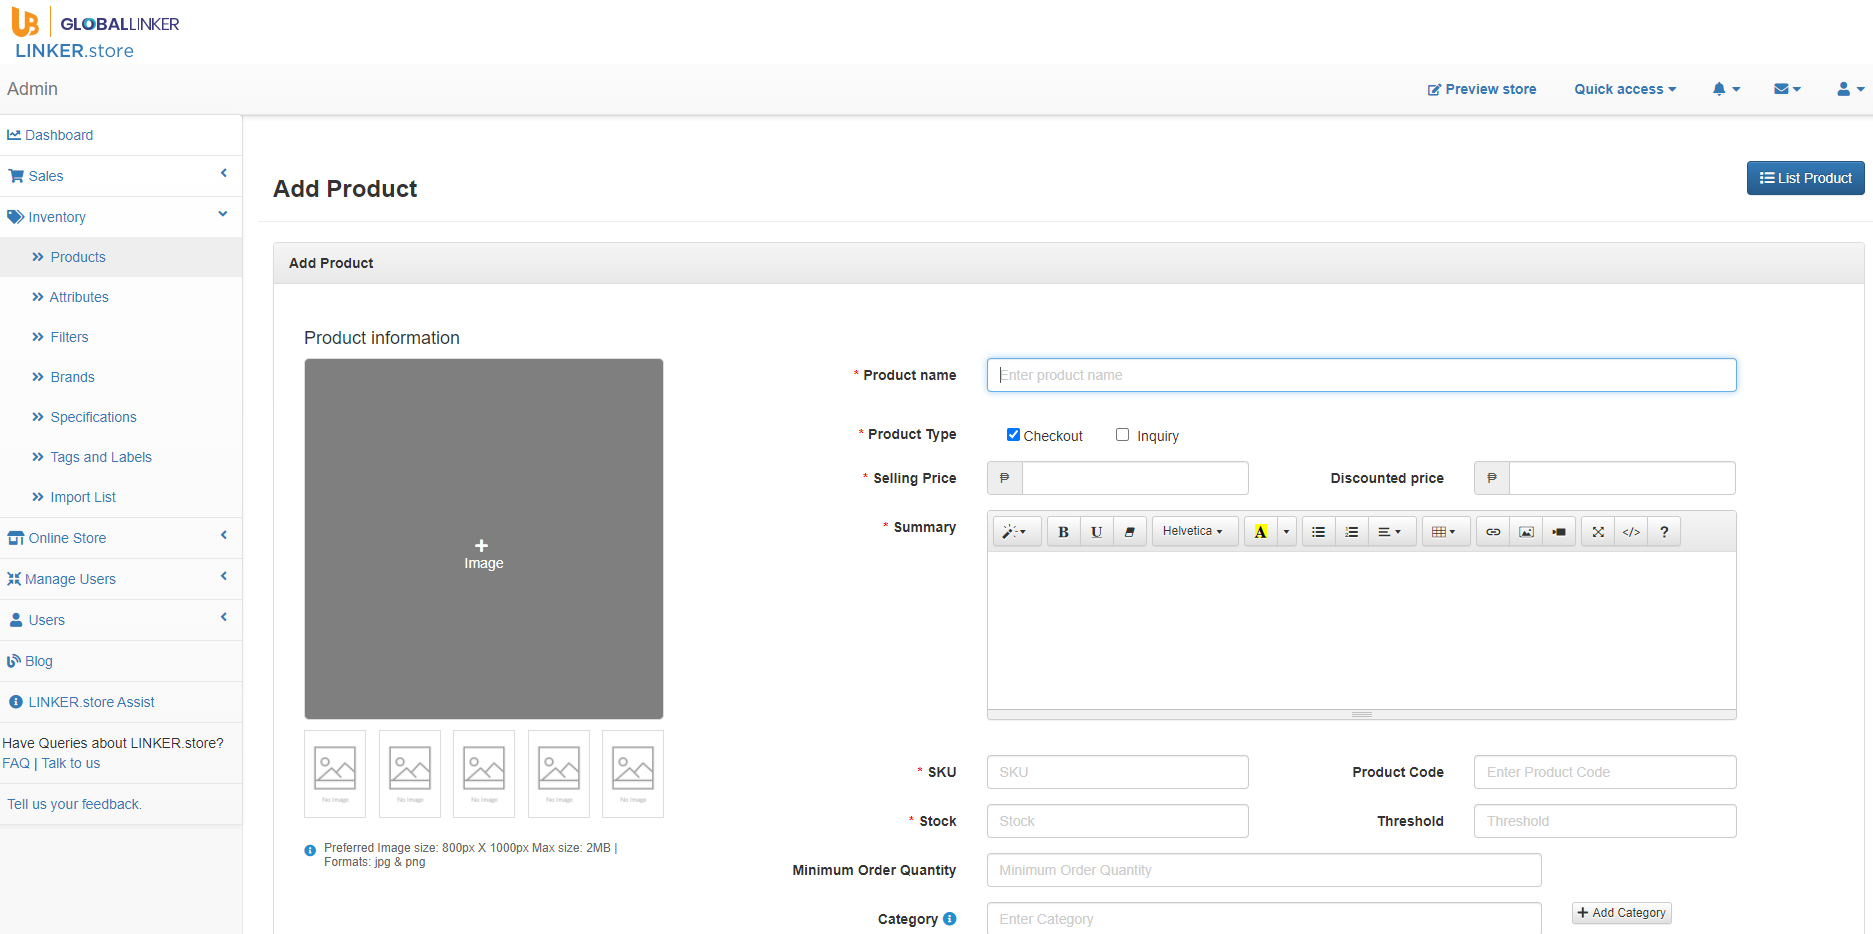
While adding products manually, you will have to add each product individually.
Fill in the fields, as explained below.
Product name: Add the product name here. The name of the products will be common for all of its variants.
Price details: Selling price is the product variant's base price. You can add a discounted price if you wish to provide a discount, and the difference will be shown as a discount.
Where no Discounted Price is entered, the buyer will buy these product variants at the selling price.
The discounted price is shown only if it is smaller than the Selling Price
Product image: You can add images saved on your system (up to 6 images per product). The recommended Image dimensions are 800 X 1000px for portrait images and 1500 X 1500 Pixels for landscape or square images. The maximum size of an image can be 12MB; however, it is recommended to keep the image size as low as possible
Summary: You need to add the product summary to give a better understanding to your customers. Ideally you should add a few lines describing the product along with bullet points explaining the benefits, features, or specifications of the products
Product Code & Product Variant SKU: Product code is used to identify products with variants so that the system can capture all the different variants available for that product. All the product variants belonging to the same product will have the same product code.
E.g., for a product name ‘T-Shirt,’ you can use the product code GRTS0102. The product code will be repeated if the product has variants.
Product Variant SKU is always unique; if you already have an inventory management system, you can use your own SKU code or create one. One thing to remember is each SKU should be unique. Let's say if there are three ss in the green T-shirt; you need to add three different SKU codes like GRTS0102-S, GRTS0102-M, GRTS0102-L
Minimum order quantity: While adding a product, sellers can specify a minimum order quantity (MOQ) against it, i.e., the minimum number that has to be ordered.
Category and Brand: Categories help you segregate your products and make it easier for your customers to browse through your online store.
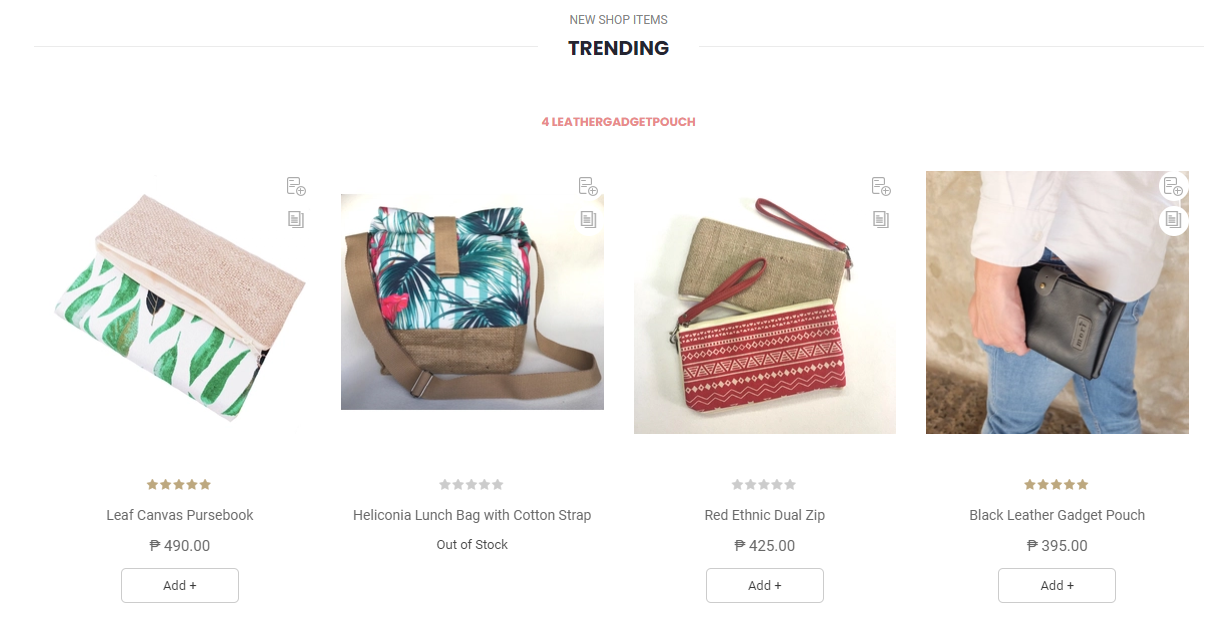
E.g., t-shirts can be categorized into men, women, kids, etc. Next, you need to add your brand name.
If the category already exists in your store, you can type the name and select it from the drop-down. If the category doesn't already exist, create a new category, and select it from the drop-down to assign it to the product.
The drop-down you see below indicates the level 2 category.

Product Labels and Product Tags: You can skip this step now and then add this once you’re done with setting up your store.

Labels are an excellent way to put the spotlight on certain products. They showcase promotions and discounts and also provide additional information on a specific product. When you decide to add them, go to Inventory -> Tags and Labels -> Label tab -> Add labels and add the label for better management. Select the label style you want. You can also have a custom label by uploading an image. Enter the Display Name text you want your customers to see, for example, “Best Seller.” The next step is to select a background color and text color. Apply a newly created label to the products via the add product section
Tags are used to club products together. They form an invisible group of products and are searchable keywords associated with your product. Whenever you would like to create tags, go Inventory -> Tags and Labels -> and click on Tags. Click on ‘Add Tag,’ and input the tag. You have a switch to enable it when you want, and then you can add products associated with it.
Product condition and visibility: Now select the product condition, i.e., new, used, or refurbished. For retail stores, select the visibility as B2C or both. If your store has Supply Chain enabled, you can also choose B2B for products to be visible only to your trade partners.

Product description: Description is used to share detailed information about the product. Unlike the summary, where brief information is added, there is no such restriction in this section. It is typically to showcase technical specifications, health benefits, or ‘how to use’ information.
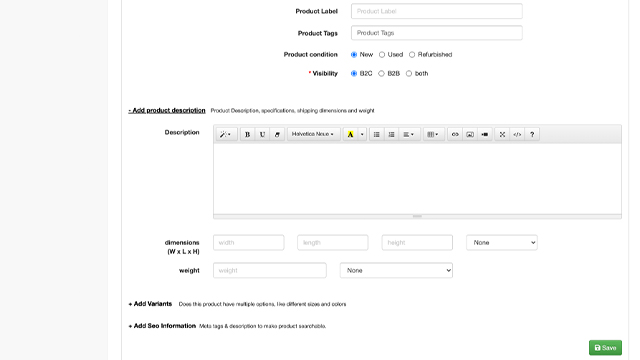
Product Variants: Attributes are used to define the variants of complex products.
- Attribute Name: Define the basis of variation, that is whether the variation is on basis of s, color, weight, RAM, Storage etc. For example, a T-Shirt available in different ss then the attribute label will be “s”
- Attribute Value: It is used to define the corresponding value of the variant, continuing on with our example of T-Shirt, for Attribute Label S, the corresponding Attribute Values can be Small, Medium, Large, Extra Large etc
Note: As you start typing in the Attribute Value, add a Comma and the system will accept the field. For example, after typing ‘small’, press comma; the system will accept the value and a new row will appear below.
Images for product variants: If you have separate image for the product then please add the images for respective variant SKU: Type in the SKU code
Selling Price: Type in the selling price of the variant
Stock: Type in the number of units you have for the product

Once you have added all the required information, click on Save and the product will get uploaded. Repeat this same process for each product.
IMPORTANT: Since, the manual process can be time consuming we also have a bulk upload process, which is faster and much easier to manage. Below are the steps to use the bulk upload feature.
Bulk Product Upload
You will be able to do this once you have completed the basic steps to set up your store.
Open your seller panel on the left and click on Inventory ->Products. On the top, right, you will see an Add Product button. Click on the arrow next to it and click on Import products (xsls, csv).
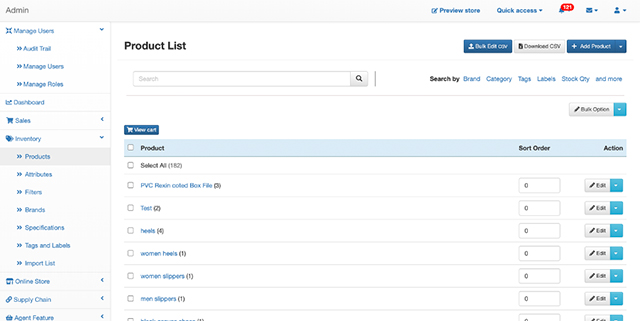
Once you click on Import Products (xsls, csv), the following page will open up.
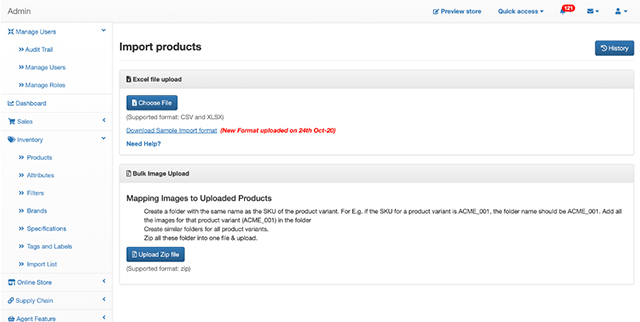
Download the Sample Import Format.
This is an excel sheet that you can use to make your inventory management more effortless.
Note: Every time you want to update your inventory, download the format from your seller panel, don’t use the old one. This is because we keep updating it to suit the requirements of our members and to make the platform richer. Remember this to avoid any technical issues.
Once you download the file, you will see an excel with pre-created columns and some sample products added for easier understanding. Based on the fields explained in the manual process, you can add all your products on this excel sheet.
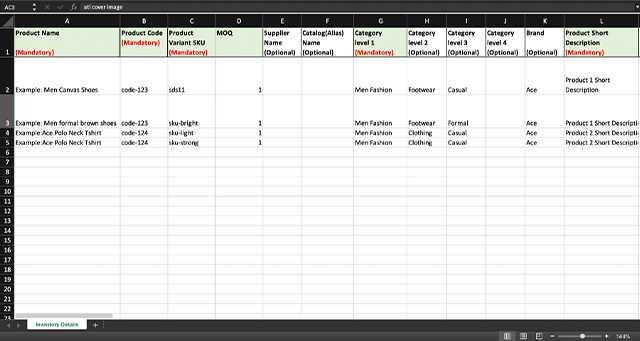
Once, you have added all the products to the excel sheet, it is ready to be uploaded on your online store.
Uploading the excel sheet: to your seller panel -> inventory products. On the top right click on the arrow next to Add Products and select import products (xsls, csv).

Click on choose file, select the correct excel file, and upload it.
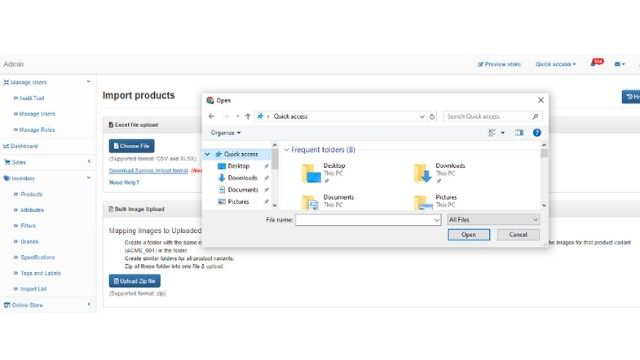
As you upload the page, a new window will open with the mapping of the excel sheet columns and the system. Review this to ensure all the columns are mapped properly. Click on Save and move on to the next page.
On the next page, you will now see one product details mapped to the system to ensure everything is in place. Review and verify that everything is shown properly and then click on Start Import.
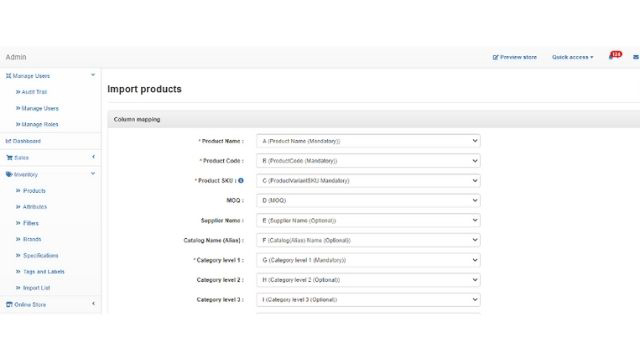
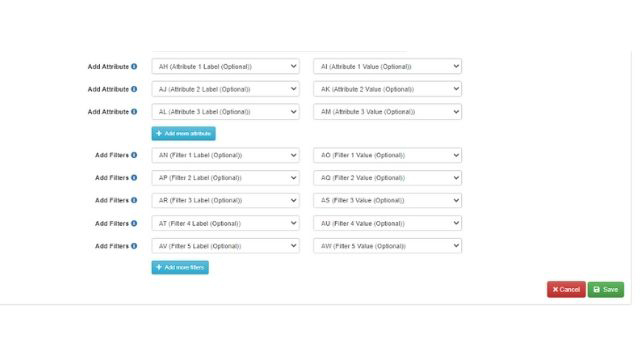
Based on the number of products, it’ll take some time. In case you are using the zip file for images, first upload the excel sheet and only then upload the zip files.
Note: There will be a lag between upload of products and display on front end of your eStore. In case you are uploading products using URL method then images will start appearing few minutes after product upload is completed.
STEP 4: Set up payments
Cash on delivery: This is to allow the customer to pay for his/her order with cash when they receive it. It is auto-enabled. You can disable it if you please.
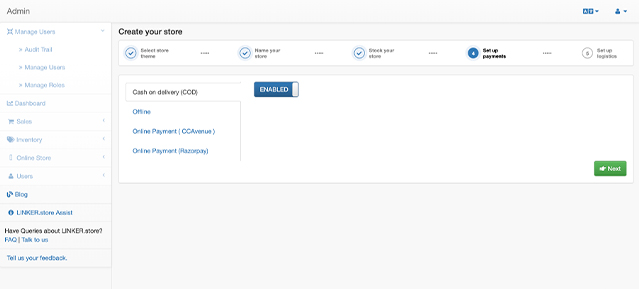
Offline: Add your bank account details so your customer can pay you using NEFT, RTGS, etc. This is used in the case that you want to allow the customer to make the payment when they receive the order, but through a transfer.
Online Payment: We have a leading payment gateway for you, Paymongo.
STEP 5: Set up logistics
Courier services: We provide you with an integrated logistics partner, the service provider depends on your location, most of you will see Payo as your service provider. We will bring more partners on board for your options.
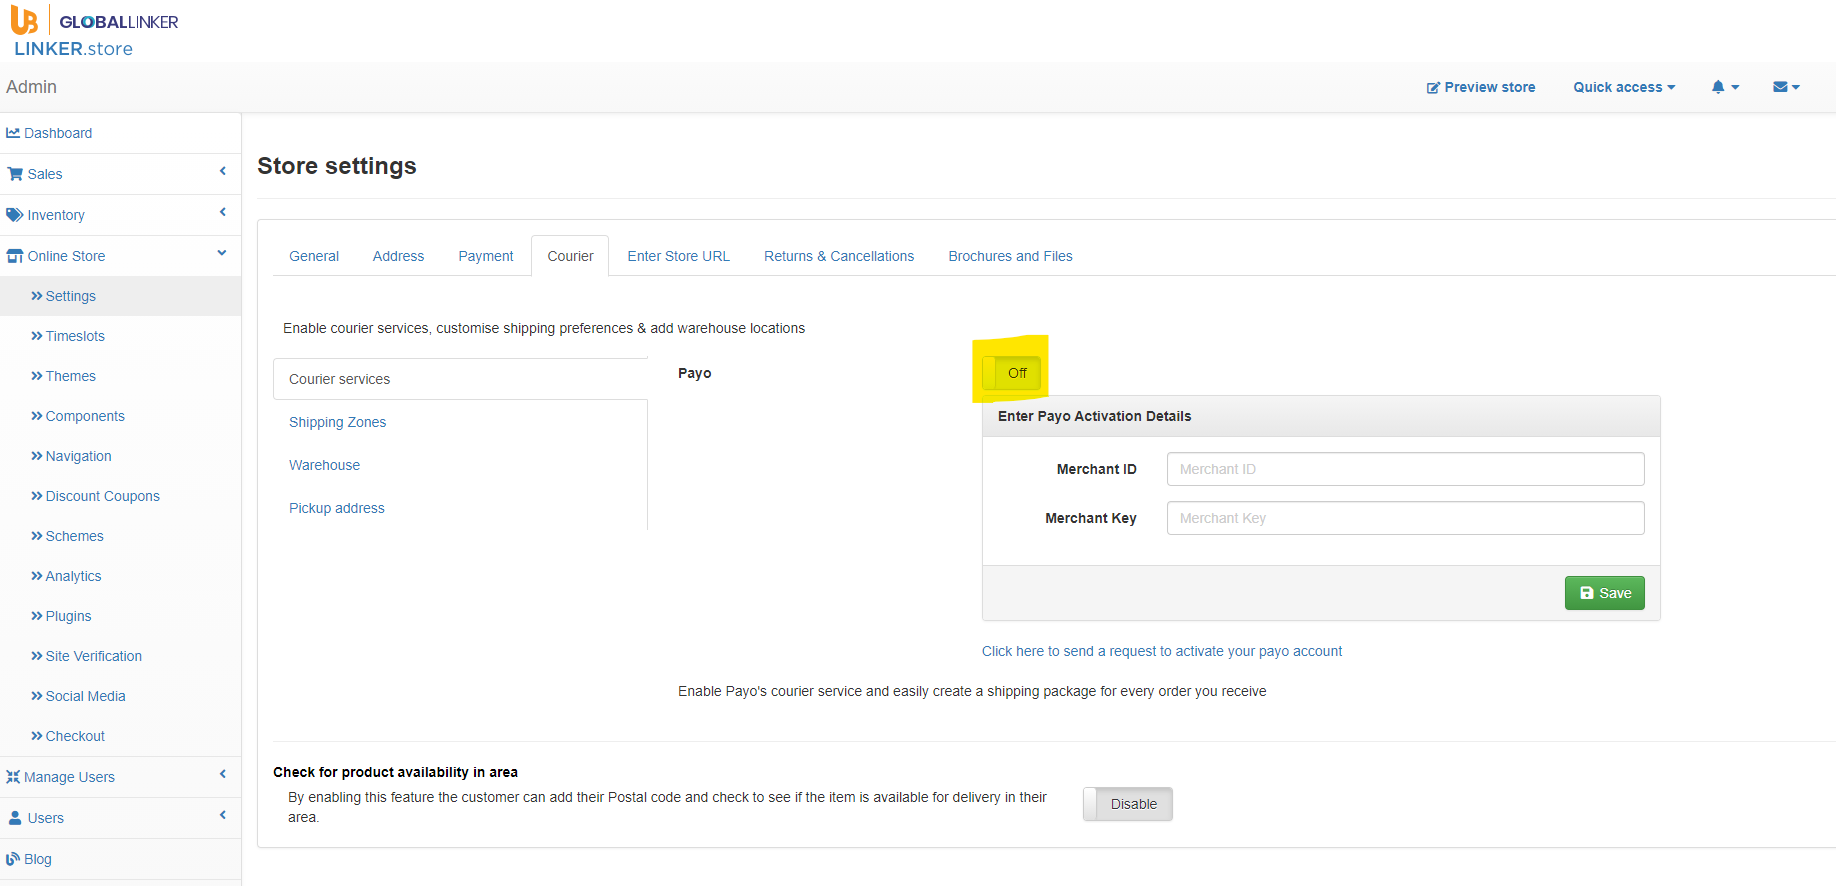
Shipping zones: These are created to accomplish two broad objectives: To define the geographic regions from where orders can be placed for your products and to define the shipping fees basis the geographic region to which the product will be delivered. You can either edit the default shipping zone or click on Create Shipping Zones.
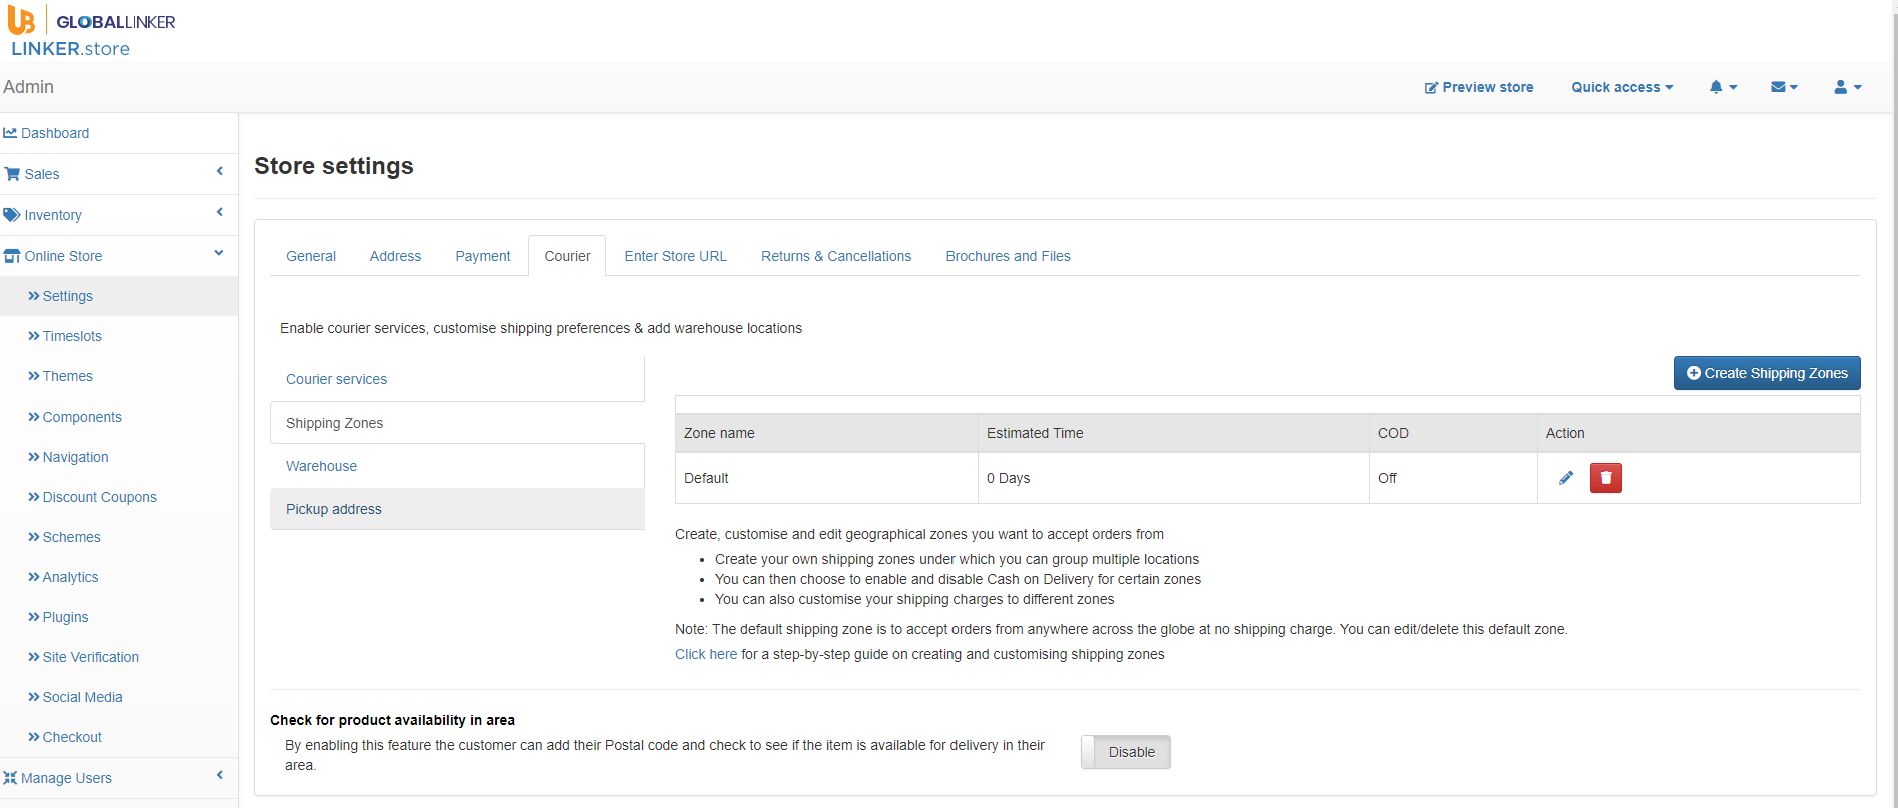
You can have multiple shipping zones that offer different shipping costs and COD availability. Remember, when a customer checks out on your estore, the zone that matches the customer location will be applicable,
Create a shipping zone
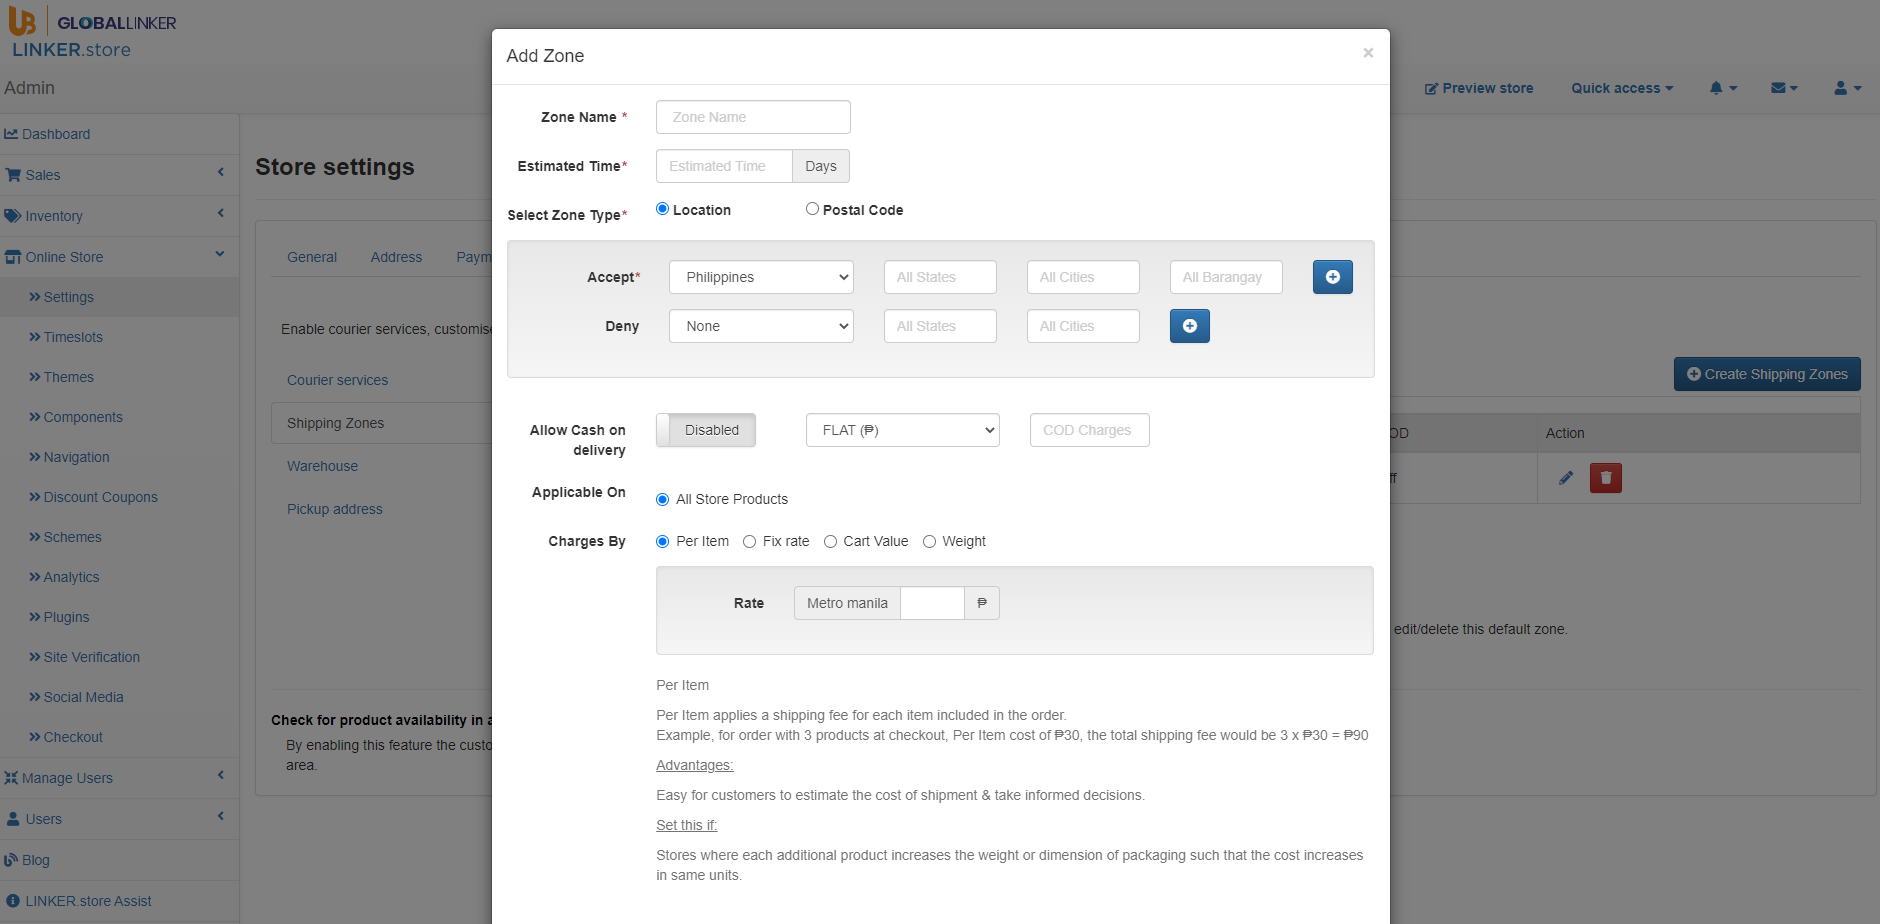
Name the shipping zone. The name should help you understand the geographic region. Common examples are local, domestic, Zone A etc. Estimated time is the time that the courier should ideally take to reach the customer. This is used by the system to track orders and inform the customer about any delay in orders.
Select a geographical area
To define the geographic area, two methods are available. It can be determined based on location (country, state, and cities) or on a simpler postal code method.
To add a list of cities, select Location in Select Zone Type. Then select the country name, state, and city. Click on the + (plus) sign to add more.
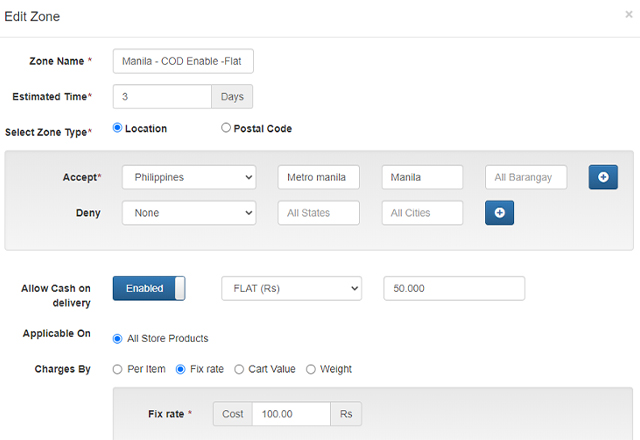
Customize COD and shipping charges
Depending on the customer segment, you may want to enable or disable the shipping zone's COD option. You can charge a cash handling fee in terms of fixed or variable as a percentage of the cart amount. If COD is disabled on your payment settings, you will not see the Shipping Zones' COD option.

Define shipping charges
By default, the shipping cost is set to 0, unless you specify it.
The following methods are available to define the shipping fee.
- Per Item: Define a per item rate and the system will charge based on the number of items a customer is ordering
- Fixed Rate: Define a standard delivery fee which will be shared to the customers irrespective of weight or value of the order
- Card Value: The benefit of this method is that it allows you to collect a delivery fee and, on the other end, incentivizes your customers to place higher value order. You can create slabs of the order value and define corresponding shipping fees. You can consider to offer a nominal or free delivery above a certain order value
- Weight: This is one of the most commonly used methods. Before you decide to use this, you will have to add a weight to all the products on your eStore. Only then system will be able to calculate the delivery fee. In this method, you can choose either to set a standard per kg or per gram weight and the system will multiply it with the weight of the order or create weight slabs with the corresponding delivery fee.
Your store is set up!
For further assistance, write to us at ‘info@linker.store’
Network with SMEs mentioned in this article
View GlobalLinker 's profile
Other articles written by GlobalLinker Staff
It’s a match: How to find the right business partner
122 week ago
Most read this week


Comments (1)
Share this content
Please login or Register to join the discussion