How to upload banners and customize colour schemes on your eStore

Ecommerce


221 week ago — 6 min read
Humans are visual creatures. 90% of the information transmitted to the brain is visual, and it is processed 60,000 times faster than any other type. On your eStore, visuals attract attention and are more likely to draw customers in to explore your products. There are two visual aspects that can really impact the appeal of your eStore:
- Attractive banners
- A color scheme that reflects your brand identity
Here is a step-by-step guide to help you understand how to upload banners and customize your color scheme on your Linker.store.
First, ensure you have completed your store setup. If you have not, you can refer to this detailed guide.
Upload banners
Get your banners created with the help of a designer. Alternatively, our partner Chimes Consulting can assist you in designing your banners. Chimes Consulting specializes in creating eye-catching banners, customized to your demands at a very reasonable price. To know more click here.
There are 4 different types of banners you may have to upload:
1. Main slider banners
2. Sub banners
3. Category banners
4. Left hand side banners
Follow these steps to upload banners on your eStore.
Step 1: Log in to your UnionBank GlobalLinker account.
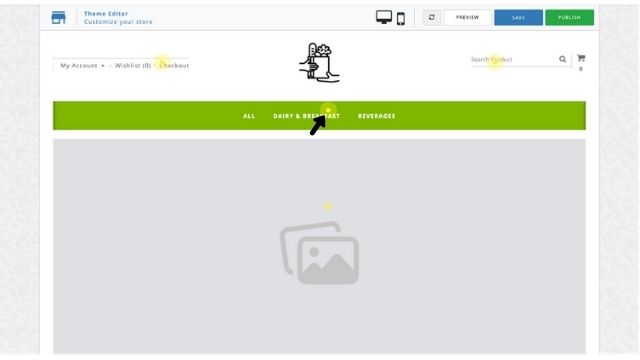
Step 2: Click on the Online Store button at the top menu bar. You will see a dropdown. Click on Manage Store to open up your Seller Panel.
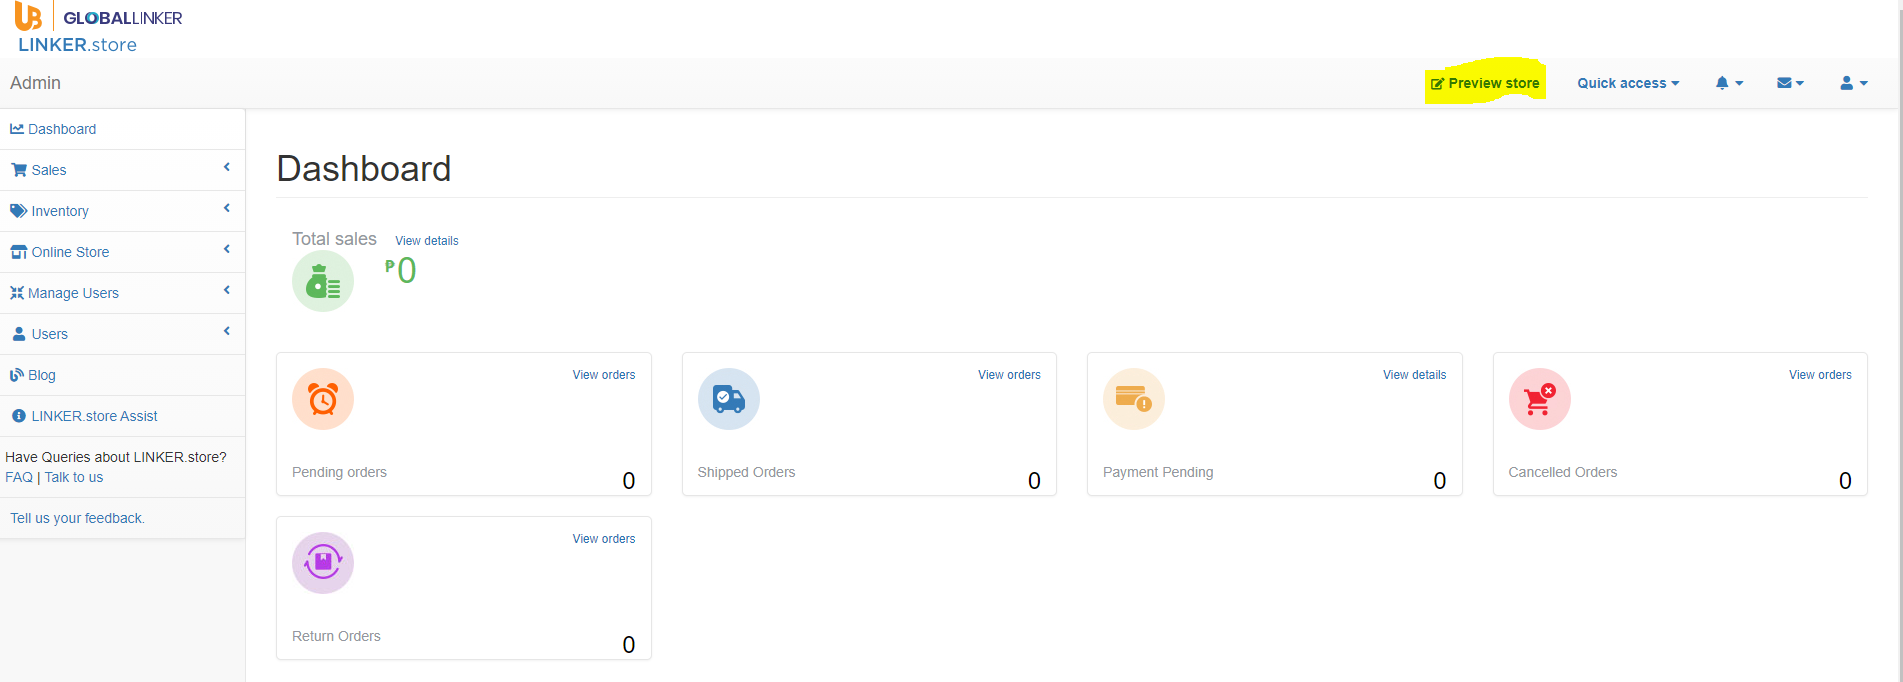
Step 3: Once you are on your Seller Panel, click on Preview store on the top right side.
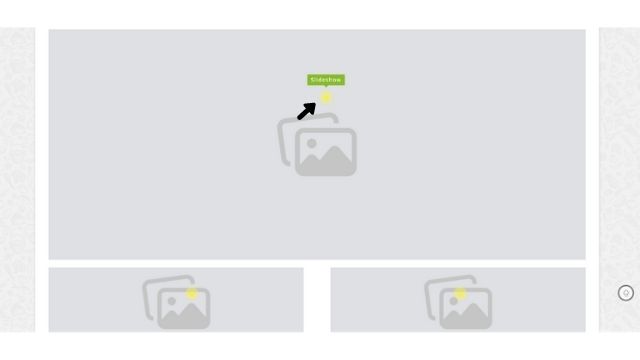
Step 4: Once you click on Preview Store, you will see your live site, which has several yellow dots. To upload a creative on either of the banner spaces provided, click on the yellow dot in the middle.
The number of banners required depends on the theme you have selected. You also have the option to delete the extra banner spaces, if required. Banner dimensions vary for every theme.
Note: You will see the banner dimensions when you click on the yellow dot.
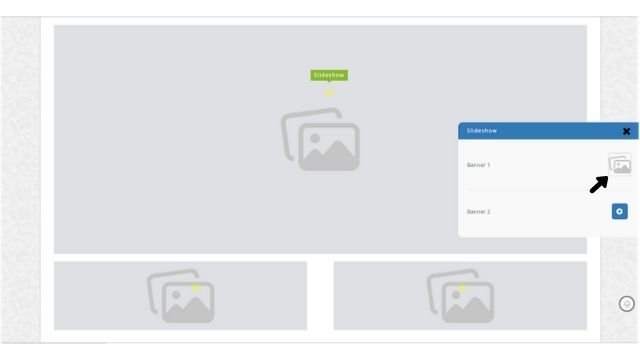
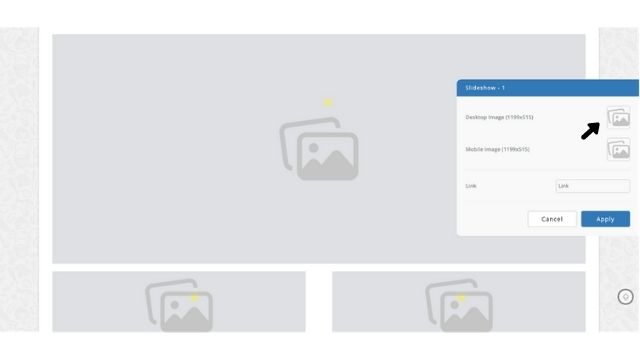
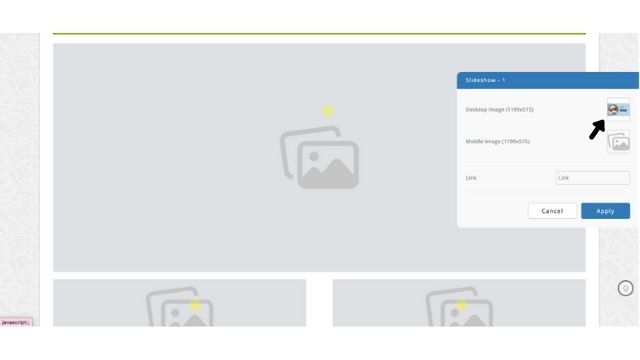
Step 5: Once you click on the yellow dot for the main slider banner, a pop-up opens. Click on the image icon, for the respective banner.
You can upload up to 5 images here, which will keep changing like a slideshow on the live site.
Step 6: You will see two options i.e., desktop, or mobile. Once you click on the image icon of either, the image manager will open up.
Note: The main slider banner is to be uploaded in two sizes: desktop and mobile. The remaining smaller banners on the site need to be uploaded in one size - the same for desktop and mobile.
Step 7: On the image manager; you need to click on Upload.
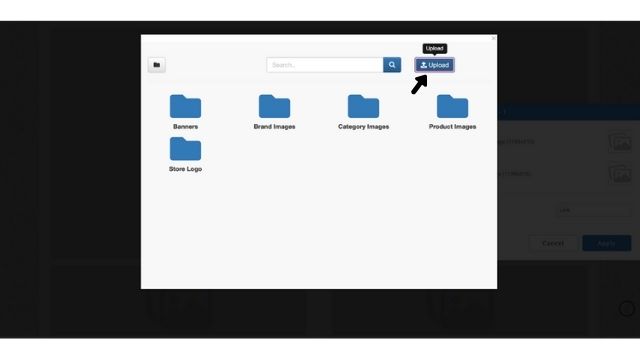
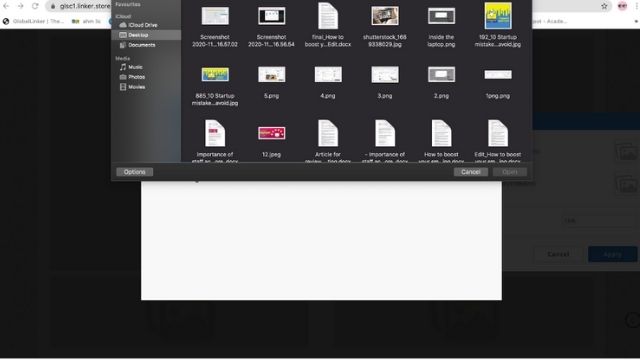
Step 8: Select the desired banner images or creatives from your device. You can upload the files for all your banners in one go.
Step 9: Once you see all uploaded creatives on the image manager, select the one you want to upload for the desktop version of the first banner.
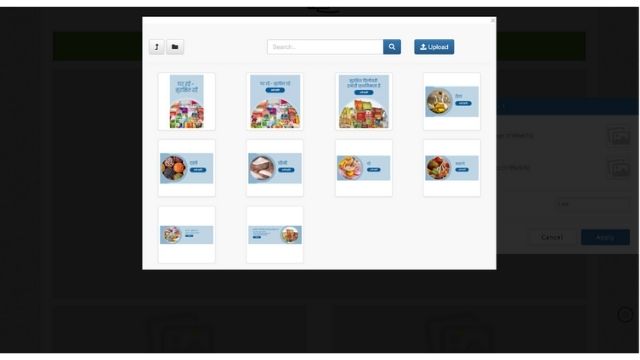
Step 10: You will then see your selected image in the small image icon on the pop up. Review it and click on Apply.
Step 11: Your selected image will now reflect on the Preview store page. Check that it looks okay to you. Similarly, you can add the rest of the banners. Once you’ve added all the banners, click on Publish on the header of your Preview store page.

You have now successfully added your banners.
Customize your color scheme
The color schemes of the following components of your eStore can be personalized:
1. Header
2. Navigation
3. Footer
4. Footer text
5. Footer heading text
6. Social Media icon block
7. Subscription input
8. Subscription button
Step 1: Log in to your UnionBank GlobalLinker account.
Step 2: Click on the Online Store button at the top menu bar. You will see a dropdown bar. Click on Manage Store to open up your Seller Panel.
Step 3: Once you are on your Seller Panel, on the top bar on the right side, click on Preview store.
Step 4: Click on the yellow dot on the component that you want to customize.
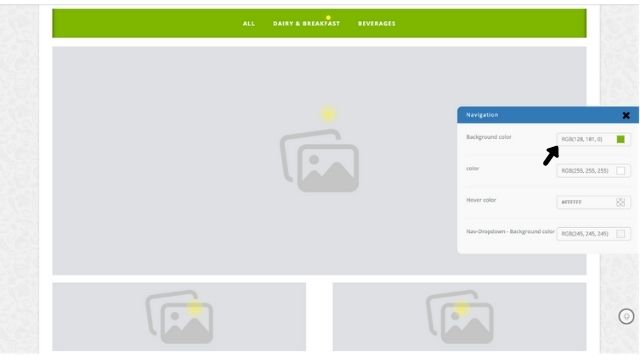
For example: Click on the yellow dot on the Navigation Bar.
Step 5: A new pop-up tab will open. Click on the field that you want to change the color of.
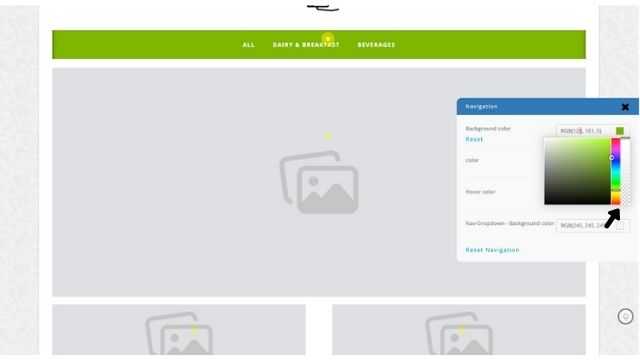
Step 6: The color selector will open. Use the Color Picker to select a color. You can also change the color tones and increase or decrease its transparency with the two bars on the right side of the pop up.
When you change the color, it will automatically reflect on your store.
Note: In case you have the exact color code, simply type or copy-paste the RGB color code
Step 7: After selecting a color, it will reflect on the preview store page. Review your store to check if the color scheme is reflecting as you like.
Step 8: Once you are happy with all your changes, click on Publish on the header of your eStore.
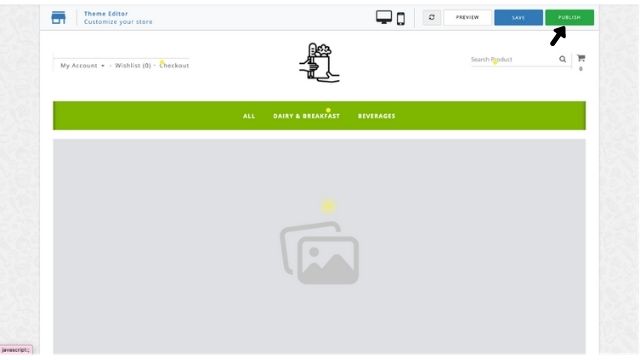
You have now successfully changed your color scheme.
For further assistance, write to us at info@linker.store
View GlobalLinker 's profile
Other articles written by GlobalLinker Staff


It’s a match: How to find the right business partner
125 week ago
Most read this week

Comments
Share this content
Please login or Register to join the discussion